
Selling a property with awkward or empty spaces can be challenging. The rooms may have strange dimensions, pillars in inconvenient places, or be completely unfurnished. While these quirks can turn off potential buyers or tenants, there are ways to downplay or even turn them into selling points. This is where creative CGI (computer-generated imagery) can come in handy for your property photography.

Assess the Problem Areas
First, walk through the property and make note of any spaces that seem problematic. This may be a long, narrow hallway, an unfinished basement, or an entire empty room. Consider what it is about the space that could put people off or leave them unsure about how to utilise it. The goal of using CGI is to address these issues directly.
Think About the Possibilities
Just because a space is currently awkward or empty doesn’t mean it can’t serve an important purpose with the right furnishings and layout. Even structural elements like pillars and low ceilings can be downplayed or incorporated into the design aesthetic. Brainstorm ideas for how the space could optimally be used, whether as a home office, playroom, reading nook, etc. CGI makes it possible to visualise anything you can imagine.

Find Quality CGI Assets
There are many resources for CGI models and assets, but quality can vary dramatically. Work with a reputable CGI artist or company that offers plenty of customisation options and high-resolution renders. For property photography, CGI elements should blend seamlessly into the environment, so realism is key. Spend time curating furniture, materials, lighting and accessories that suit the style of the home.
Set Up the Base Photos
Before inserting any CGI, set up and shoot the “base” photos showcasing the empty spaces as they currently exist. Take plenty of images from multiple angles, as this will provide flexibility later on. Neutral lighting tends to work best, avoiding harsh shadows that could limit options. Shoot RAW images for maximum quality and editing control. Backup all photos before editing.
Plan the Shot List
Conceptualise exactly how you want to portray the spaces and make a detailed shot list. This should specify where you’ll place furniture, how rooms will be styled, which angles you’ll use, etc. Planning ahead ensures the final CGI images support the intended narrative and style for marketing the property. It also informs what custom models you may need created.
Insert the CGI Objects
Using Photoshop or similar software, meticulously insert the CGI objects you’ve sourced, following your shot list. Adjust sizing, positioning and lighting as needed to fit, factoring in shadows, reflections and perspective. Composite multiple images to build up the desired styled look. Take your time with this step, as poor execution can make CGI very obvious.
Enhance Photos
Even after inserting CGI objects, photos may require colour correcting, exposure adjustments and retouching to finish the photorealistic look. Carefully review images at 100% magnification, making localised tweaks. Add final touches like props, wall art and textiles to enrich the spaces. Apply subtle grain or noise if necessary to offset over-smoothing.
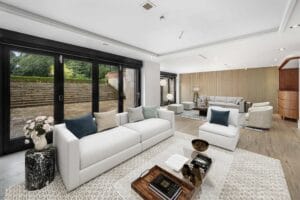
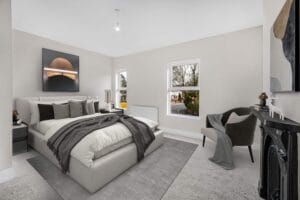
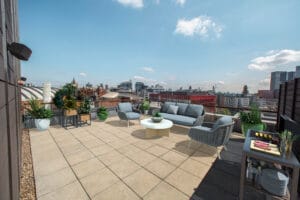
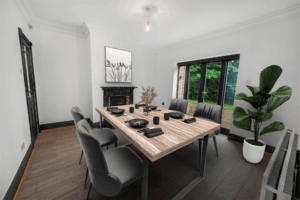
Showcase the Transformation
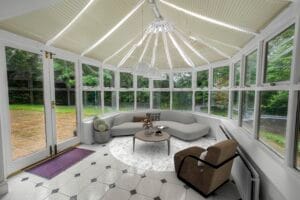
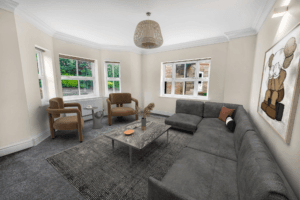
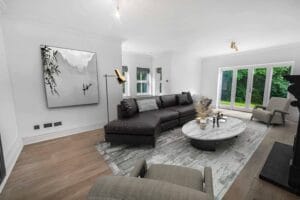
With awkward empty rooms now full of furnishings and style, showcase the dramatic “before and after” transformation. The contrast speaks volumes, immediately conveying the potential of the previously unused space. Lead with the gorgeous CGI rendition, then include a smaller “before” image for context in marketing. The possibilities unlocked through CGI will capture buyer and tenant imaginations.
CGI opens up new opportunities to showcase the versatility and best possible use of challenging property spaces. We at Hovver can help you with getting the most out of CGI for property staging. Take advantage of this potent visual marketing tool to pique interest and demonstrate exactly why your property has immense potential, despite any awkward quirks.